After completing Draft One of M2 about three weeks ago, I was so fatigued. Mentally, I felt like I couldn't even write another page if I wanted to. Originally I thought I would send draft one as is to a CP after a read through so that she could just tell me everything that was wrong with it. But I realized just how lazy that was and if someone was going to read my story, I'd at least put my best foot forward.
So I took a mental break for two weeks (though at the time, I thought of giving myself a month to make sure I had some distance), but in the two weeks I binge read everything I could. And I found that the more you read and fill up your head, the more your own story recedes in the back of your mind, when you read for full on pleasure (and reviewing).
So after those two weeks of reading I came up with a timeline for the next month of revising for draft two:
Week 1: In-depth read through of manuscript from beginning to end.
Week 2: Revise beginning, based on notes.
Week 3: Revise middle, based on notes
Week 4: Revise ending, based on notes.
Week 5: Send to CP's and begin drafting query and synopsis.
***After receiving notes from CP's, do a third revision and send to betas. Revise query and synopsis accordingly.
At the end of week four, the revised draft, we'll call it 'M4v2,' will probably still contain sentence level issues (line-edits), but I hope by the end of it, the story will be nailed down and developed. If not, then CP's will be of much help!
My 'Read Through' Process:
I do exactly that. Read through the entire first draft. From the moment I typed 'The End,' I didn't allow myself to go back and make any changes, or even look at it.
So first and foremost. Print the damn thing.
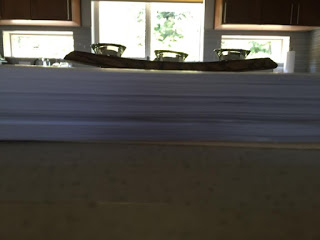
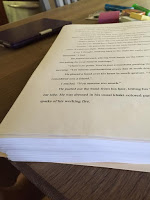
Do not load on your kindle or read from the screen. Get back to the paper and pen and correct using the old school tools so you can make notes on the margins, add stuff between the lines, correct grammar, and note big picture stuff in your notebook. Printing it also gives you a visual of what you have accomplished.
As you go through it, organize your thoughts by highlighting and tabbing important details. I give myself a week just to read through because as you go, you are analyzing and thinking about how these words on the page stack up to what you want the story to accomplish. That's a lot of stuff to fill your head space so do it in a place you can concentrate. For me that was my home office in absolute silence. To assist you in your revision plan, take a look at mine in the next section.
My Read Through Tips for Revision:
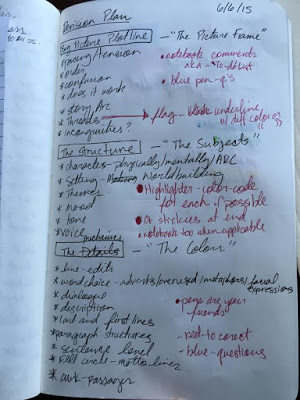
Create a game plan. List what you are looking for. For me, it was three levels of stuff I was looking for: Big picture (the picture frame also known as the plot line), the structure (the subjects), and the details (the colors). To understand the three levels to look for, I correlate it by looking at a picture:
When going through revisions you want to work from the outside in. Get the frame, then the subjects, and then the little details. So after my read through, my priority was the big picture and structure. The details will be an ongoing process throughout the whole revision/rewrite process.
Now that you have the game plan, implement it during your read through, marking and labeling it up, as you go. When you finish you will get a glimpse of the whole picture with notes to assist you during your round of revision.
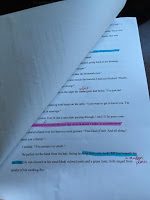
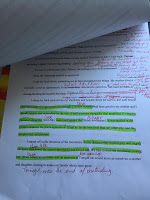
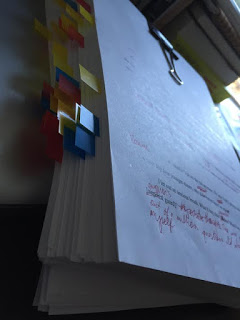
For that I tabbed different threads by color, and major to-do's with post-its (big picture stuff). For structural stuff I used highlighters, color coding character descriptions, settings, important quotes, and significant details. Everything else I marked up in red pen (quick changes right in the page) or blue pen (questions for myself to think about for the next draft).
Below are some examples from my own manuscript. Remember that everyone's process is different. I find that I learn a lot about my own process when I read about other people's. So this is me just sharing ideas, too, and I'd love to hear yours in the comment box below!

As you can see I highlight using a color code system and edit right on the page with notes and additional passages.
The way I've written M4, while also keeping myself accountable through my blog, has made a vast difference in the quality of my first draft. I always dub my first draft the 'vomit' draft, because it turns out so messy, so unclear, that I nix about 80% of it and keep 20%. By the time I hit the final draft. I have about 5% of my actual first draft still in there. This time, because I had a clear outline and I knew what the story was about and I knew my characters, I was more prepared to write, and therefore this first draft is by far my strongest first draft.
Of course I wasn't always so sure. The beginning actually needs a lot of work because I still hadn't figured out the kinks or knew the character's backstory's in detail, but as the story became clearer the more I wrote, so did the writing. Remember my dreaded middle I talked about in this post and this post? It actually turned out to be the best part of my story and doesn't need as much work as the beginning or ending. Who would have thought?
Another thing I learned was to shut off the negativity in my head. You know, that critical voice that always complains and says 'This sucks!' or 'Really, you think you can be a writer?' I kind of gave it the finger because I saw how much I've improved these past two years where I've dedicated myself to novel writing.
Now, the best part of the read-through? Connecting your 'themes.' Sometimes you sit down with a theme in mind, and sometimes you don't. But in the read through you see your themes fully realized. Their like hidden gems as you read, full of delight and just makes the story come together. It's like the subconscious knows how to weave it in and you just have to find it to see it. I didn't have a theme in mind, so when I saw it naturally through the pages, it kind of made my day.
Hopefully by looking into my process it gives you ideas into your own! Share your tips below in the comment box!
Happy writing/revising! Until next week for another WWPR (Weekly Writing Progress Report)!
So I took a mental break for two weeks (though at the time, I thought of giving myself a month to make sure I had some distance), but in the two weeks I binge read everything I could. And I found that the more you read and fill up your head, the more your own story recedes in the back of your mind, when you read for full on pleasure (and reviewing).
So after those two weeks of reading I came up with a timeline for the next month of revising for draft two:
Week 1: In-depth read through of manuscript from beginning to end.
Week 2: Revise beginning, based on notes.
Week 3: Revise middle, based on notes
Week 4: Revise ending, based on notes.
Week 5: Send to CP's and begin drafting query and synopsis.
***After receiving notes from CP's, do a third revision and send to betas. Revise query and synopsis accordingly.
At the end of week four, the revised draft, we'll call it 'M4v2,' will probably still contain sentence level issues (line-edits), but I hope by the end of it, the story will be nailed down and developed. If not, then CP's will be of much help!
My 'Read Through' Process:
I do exactly that. Read through the entire first draft. From the moment I typed 'The End,' I didn't allow myself to go back and make any changes, or even look at it.
So first and foremost. Print the damn thing.
Do not load on your kindle or read from the screen. Get back to the paper and pen and correct using the old school tools so you can make notes on the margins, add stuff between the lines, correct grammar, and note big picture stuff in your notebook. Printing it also gives you a visual of what you have accomplished.
As you go through it, organize your thoughts by highlighting and tabbing important details. I give myself a week just to read through because as you go, you are analyzing and thinking about how these words on the page stack up to what you want the story to accomplish. That's a lot of stuff to fill your head space so do it in a place you can concentrate. For me that was my home office in absolute silence. To assist you in your revision plan, take a look at mine in the next section.
My Read Through Tips for Revision:
Create a game plan. List what you are looking for. For me, it was three levels of stuff I was looking for: Big picture (the picture frame also known as the plot line), the structure (the subjects), and the details (the colors). To understand the three levels to look for, I correlate it by looking at a picture:
- When you see a picture you, immediately see the picture frame, what's holding the picture together. That's your plot line, it needs to hold up otherwise the whole thing will fall apart. When analyzing books for review, I noticed that if the plot line is out of whack, and doesn't make sense, or isn't believable, then nothing else would. The frame or plotline is the skeleton that holds up the story.
- The next thing you look at are the subjects or objects of a painting. These are your characters, the settings, themes, mood, tone, etc.
- Then the thing that really makes the picture pop are the colors, or details. In writing, that's the writing style and prose.
When going through revisions you want to work from the outside in. Get the frame, then the subjects, and then the little details. So after my read through, my priority was the big picture and structure. The details will be an ongoing process throughout the whole revision/rewrite process.
Now that you have the game plan, implement it during your read through, marking and labeling it up, as you go. When you finish you will get a glimpse of the whole picture with notes to assist you during your round of revision.
For that I tabbed different threads by color, and major to-do's with post-its (big picture stuff). For structural stuff I used highlighters, color coding character descriptions, settings, important quotes, and significant details. Everything else I marked up in red pen (quick changes right in the page) or blue pen (questions for myself to think about for the next draft).
Below are some examples from my own manuscript. Remember that everyone's process is different. I find that I learn a lot about my own process when I read about other people's. So this is me just sharing ideas, too, and I'd love to hear yours in the comment box below!
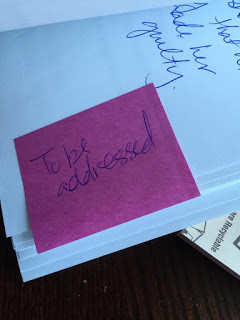
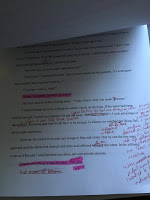
Here's an example of when I use stickies: when things need to be moved or things that weren't fleshed out enough that I need to address in the next draft.
As you can see I highlight using a color code system and edit right on the page with notes and additional passages.
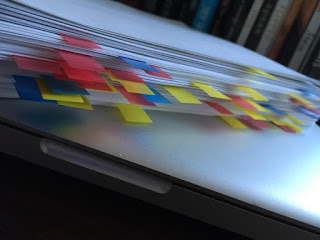
All the while, I tab my threads throughout using a color code system. By the end this is what I got. Just visually, I like how it's sprinkled through out and not concentrated in any one color or any one area (beginning, middle, or end). It's spread throughout which is a good balance.
Now I'll quickly skim through what I've done and build a to-do list along with my notes directly on the pages. This will act as my guide for the next round.
What I learned from my 'Read Through': The way I've written M4, while also keeping myself accountable through my blog, has made a vast difference in the quality of my first draft. I always dub my first draft the 'vomit' draft, because it turns out so messy, so unclear, that I nix about 80% of it and keep 20%. By the time I hit the final draft. I have about 5% of my actual first draft still in there. This time, because I had a clear outline and I knew what the story was about and I knew my characters, I was more prepared to write, and therefore this first draft is by far my strongest first draft.
Of course I wasn't always so sure. The beginning actually needs a lot of work because I still hadn't figured out the kinks or knew the character's backstory's in detail, but as the story became clearer the more I wrote, so did the writing. Remember my dreaded middle I talked about in this post and this post? It actually turned out to be the best part of my story and doesn't need as much work as the beginning or ending. Who would have thought?
Another thing I learned was to shut off the negativity in my head. You know, that critical voice that always complains and says 'This sucks!' or 'Really, you think you can be a writer?' I kind of gave it the finger because I saw how much I've improved these past two years where I've dedicated myself to novel writing.
Now, the best part of the read-through? Connecting your 'themes.' Sometimes you sit down with a theme in mind, and sometimes you don't. But in the read through you see your themes fully realized. Their like hidden gems as you read, full of delight and just makes the story come together. It's like the subconscious knows how to weave it in and you just have to find it to see it. I didn't have a theme in mind, so when I saw it naturally through the pages, it kind of made my day.
Hopefully by looking into my process it gives you ideas into your own! Share your tips below in the comment box!
Happy writing/revising! Until next week for another WWPR (Weekly Writing Progress Report)!
